Inside:Â Smart Playlists, iTunes
Happy Mother’s Day!
Everyone just left our family Mother’s Day get-together and now I’m trying to write this newsletter while fighting off an impending food coma. Huge thanks go to my girlfriend, who not only prepared an amazing array of drinks, hors d’oeuvres, entrees, and dessert, but is also now cleaning up so that I can get out a Mother’s Day newsletter while it’s still Mother’s Day!
My minor contributions to the party included vacuuming, grilling, and making a song list for ambiance, which brings me to my new article and video…
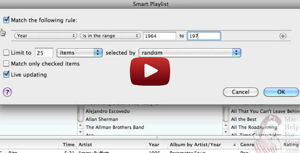
Making Smart Playlists in iTunes
Standard iTunes playlists simply let you manually drag songs into a list. But iTunes also has a Smart Playlist feature that lets you quickly build a list of songs based on rules you define. Another cool feature is that you can have your Smart Playlists automatically update when you add new songs to your music library.
I’d already made a “Mother” standard playlist for a previous video, “How to burn music CDs in iTunes”, but this time I wanted to do something different. As you’ll see in the article linked below, for today’s party I made an iTunes Smart Playlist of songs from my mom’s child-bearing years (1964-1970). When that list was too long for the party, I restricted it to only songs with high ratings (by me).
That’s just one simple example of the wide range of Smart Playlists you can quickly set up. With a little hidden trick I show in the article, it’s easy to set up lists as complex as “songs in the Rock, R&B, or Blues genres with ‘love’ in the title that are under five minutes and I’ve assigned a rating of 3 or more stars.”
This article and the video in it will have you making your own Smart Playlists in no time. Pretty soon you’ll be the family DJ!

How to make a Smart Playlist in iTunes
Word of the Week
The word is “iTunes”.
As you can tell from its name, the Apple iTunes application was originally meant for music. The name is now terribly obsolete because, although you can still use it to play music and manage your music library, you can also use it to:
- buy, store, and watch movies and TV shows;
- subscribe to and listen/watch podcasts;
- download/buy electronic books to read on your iPad or iPhone;
- download/buy apps for your iPad or iPhone;
- listen to thousands of radio stations over the Internet;
- sync and backup your iPad or iPhone.
That’s a lot more than tunes!
But, even if you just use iTunes for music, there are lots of ways you can customize iTunes’ look and feel. First, I suggest you try all four of these buttons to see which view method (List, Album List, Grid, Cover Flow) you like best.

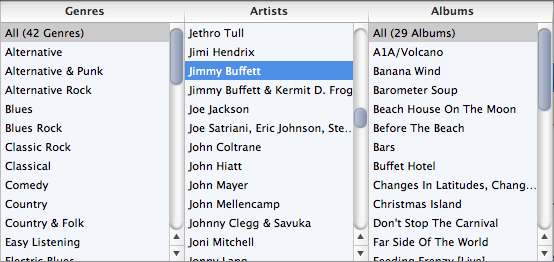
Then, in the List and Album List views, try displaying the column browser, which you can control in the View > Column Browser menu option. Here’s how I have my column browser configured but you can choose which columns to display, and whether to put the column browser on the top or left.

In the song list section, you can choose which columns to display by simply right-clicking (or Control-clicking) in the column headers,
and checking the column names you want to display. You can also click and drag columns to change their order. You can sort based on a particular column by click on that column’s header. As if that wasn’t enough control, clicking on the middle of the Album column header cycles it between three different modes: Album; Album by Artist; Album by Artist/Year. Once you’ve chosen one of these, then clicking on the right side of that header let’s you choose whether the sorting should be ascending or descending. In the image above you can see (by the darker background) that I normally sort on “Album by Artist/Year”.
But, wait! It gets even better! Remember those playlists I was talking about before. Amazingly, iTunes remembers your view method, column browser, column, and sorting settings for each playlist. Why would you want different settings for different playlists? Well, if you have a Smart Playlist of your highly rated Jimmy Buffett songs, there’s no reason to display the Artist column since you know they’re all by Jimmy Buffett. Or you might think (like I do) that the Grid and Cover Flow view methods aren’t very useful for browsing through hundreds of albums, but work just great for a playlist that only includes a couple dozen albums.
There are far too many other iTunes features to discuss in this space, but let me talk about one feature that many people don’t bother with: Ratings. iTunes lets you rate each song (or movie, podcast, etc.) with a one to five star rating. Why spend your time rating each song? One big reason: Smart Playlists. Once you’ve rated some of your songs you can take advantage of playlists that only include your favorite songs (of a particular artist, genre, decade, whatever).
How did I find time to rate all my songs? I haven’t. Of my 6,555 songs, I still have 4,103 unrated. No, I didn’t just count them. I have a Smart Playlist of all my songs with no rating, so it keeps track of them for me. I could play that list if I really wanted to focus on rating my unrated songs. But I usually just listen to whatever I’m in the mood for, and if I remember to switch over to iTunes while listening to a song, I’ll click in its Rating column to assign it some stars if I haven’t already and then I switch right back to whatever I was working on. It’s a slow process but as more of my songs get rated, many of my Smart Playlists get more songs included in them, and my music-listening pleasure grows and grows.
If you have any questions about iTunes, please reply to this email. I’d love to do more iTunes videos and articles if there’s interest.
Mac Help For Mom on Facebook
Do you use Facebook? It’s another way to learn about new Mac Help For Mom videos and interact with other people who like Mac Help For Mom. If you click the “Like” button on the Mac Help For Mom Facebook page then you’ll see the Mac Help For Mom Facebook posts in your Facebook News Feed, be able to comment on them, and join in the discussions.